Wednesday, June 4, 2014

Installing Oracle Enterprise Repository

We had a requirement of setting up oracle enterprise repository for SOA governance. Below are the steps for single node installation on weblogic server.


Oracle WebLogic Server Installation

Run the installer as follows:
-bash-4.1$ /u01/java/jdk1.7.0_55/bin/java -d64 -jar wls_121200.jar
The Welcome screen is displayed when you start the installer.


Specify the Middleware home directory that will serve as the central support directory for all Fusion Middleware products installed on the target system, including WebLogic Server.


This screen displays a list of JDKs available and also contains the option for browsing for JDK.


You can accept the default product directories or specify new directories.


This screen shows the progress of the installation. When the progress bar reaches 100%, the installation is complete.


Installing Oracle Enterprise Repository


Unzip the downloaded file and execute the jar as follows:
-bash-4.1$ /u01/java/jdk1.7.0_55/bin/java -d64 -jar OER111170_generic.jar

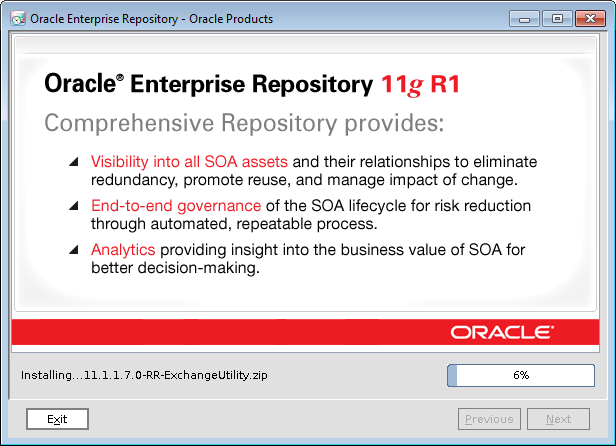
Welcome screen is displayed


Click Next and choose the  existing Middleware Home Directory.


Choose the Products Installation Directories


Specify the information required to initialize Oracle Enterprise Repository for your application server, and click Next. The Configure Database screen is displayed.


Navigate to $WL_HOME/common/bin and run the config script to start the configuration Wizard.


Select the check boxes corresponding to the OER.
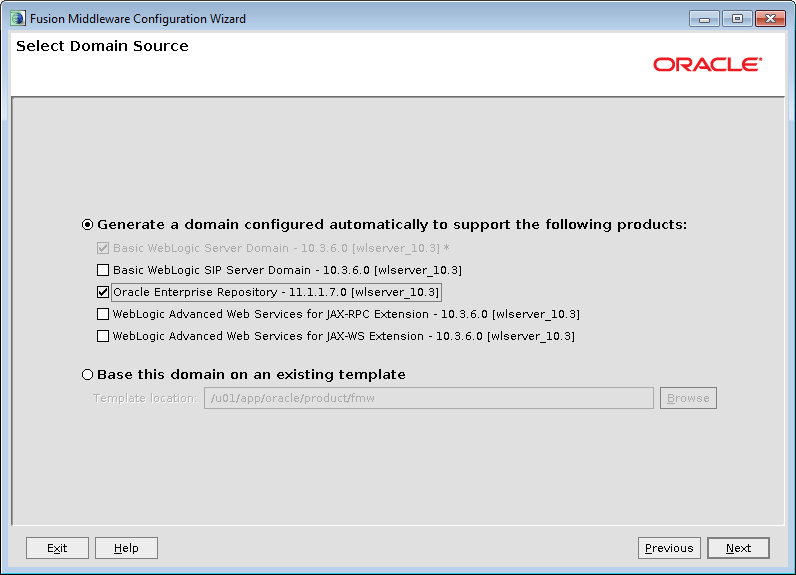


Enter the name of the domain and specify the domain location.


 Configure the username and password for the administrator. The username is used to boot the administration server and connect to it.


 Select the WebLogic domain startup mode.


Start the admin server and managed server and the OER is accesible at http://hostname:port/oer

Thursday, March 27, 2014

Java/BPEL Authenticate & Search Active Directory

We recently needed to create a BPEL service to authenticate users in Active Directory and also to search through the AD. For this we used the native LDAP classes in Java to connect to Active directory and embed the code in spring bean and expose as web service in Oracle SOA suite.


AD Authentication

We used the following code in the Spring bean for user authentication.
 public boolean isAuthenticated(String user,String pwd){      
     DirContext ctx = null;  
     boolean result=false;  
     Hashtable env = new Hashtable();  
     String ldapURL = "ldap://myhost1.company.ae:389";  
     env.put(Context.INITIAL_CONTEXT_FACTORY,"com.sun.jndi.ldap.LdapCtxFactory");  
     env.put(Context.SECURITY_AUTHENTICATION, "simple");  
     env.put(Context.SECURITY_PRINCIPAL, user);  
     env.put(Context.SECURITY_CREDENTIALS,pwd);  
     env.put(Context.PROVIDER_URL, ldapURL);  
     try {  
       ctx = new InitialLdapContext(env, null);  
       result=true;  
     } catch (Exception e) {  
       System.err.println("Invalid login for user: " + user);  
       }finally{  
       try {  
         if(ctx!=null)  
         ctx.close();  
       } catch (NamingException e) {  
         System.err.println("Invalid login for user: " + e);  
       }  
     }  
       return result;  
    }   

And below is the java code to search through the Active directory. Since we have multiple domain controls and the servers hosted in Solaris which is not in the domain we had used the ping functionality to see if the domain control is up before connecting to it.


 package sample.com;  
 import java.io.IOException;  
 import java.net.InetAddress;  
 import java.net.UnknownHostException;  
 import java.util.Hashtable;  
 import javax.naming.ldap.*;  
 import javax.naming.directory.*;  
 import javax.naming.*;  
 public class SearchAD {  
   public static void main(String[] args) {  
     Hashtable env = new Hashtable();  
     String userName ="CN=admin,OU=Application Accounts,DC=company,DC=ae";  
     String password = "******";  
     String ldapURL = getReachableHost();  
     env.put(Context.INITIAL_CONTEXT_FACTORY,"com.sun.jndi.ldap.LdapCtxFactory");  
     env.put(Context.SECURITY_AUTHENTICATION, "simple");  
     env.put(Context.SECURITY_PRINCIPAL, userName);  
     env.put(Context.SECURITY_CREDENTIALS, password);  
     //Used if LDAPS port is used  
     //   env.put(Context.SECURITY_PROTOCOL,"ssl");  
     //connect to domain controller  
     env.put(Context.PROVIDER_URL, ldapURL);  
     try {  
       // Create the initial directory context  
       DirContext ctx = new InitialLdapContext(env, null);  
       SearchControls searchCtls = new SearchControls();  
       //Array of attributes to be returned  
       String returnedAtts[] ={ "sn", "mail", "cn", "givenName", "title" };  
       searchCtls.setReturningAttributes(returnedAtts);  
       //Provide the search scope  
       searchCtls.setSearchScope(SearchControls.SUBTREE_SCOPE);  
       //Provide the LDAP filter for search  
       String searchFilter = "(&(sn=Siva*)(mail=*))";  
       //Provide the Base for search  
       String searchBase = "DC=company,DC=ae";  
       // Search for objects using the filter  
       NamingEnumeration results =ctx.search(searchBase, searchFilter, searchCtls);  
       //Iterate through the results  
       while (results.hasMoreElements()) {  
         SearchResult sr = (SearchResult)results.next();  
         System.out.println(">>>" + sr.getName());  
         Attributes attribs = sr.getAttributes();  
         if (attribs != null) {  
           try {  
             System.out.println("surname==>" +  
                       attribs.get("sn").get());  
             System.out.println("firstname==>" +  
                       attribs.get("givenName").get());  
             System.out.println("Email==>" +  
                       attribs.get("mail").get());  
             System.out.println("  cn==>" +  
                       attribs.get("cn").get());  
             System.out.println(" Title==>" +  
                       attribs.get("title").get());  
           } catch (NullPointerException e) {  
             System.out.println("Errors listing attributes: " + e);  
             e.printStackTrace();  
           }  
         }  
       }  
       ctx.close();  
     } catch (NamingException e) {  
       System.err.println("Problem searching directory: " + e);  
       e.printStackTrace();  
     }  
   }  
   public boolean isAuthenticated(String user,String pwd){      
     DirContext ctx = null;  
     boolean result=false;  
     Hashtable env = new Hashtable();  
     String ldapURL = getReachableHost();  
     env.put(Context.INITIAL_CONTEXT_FACTORY,"com.sun.jndi.ldap.LdapCtxFactory");  
     env.put(Context.SECURITY_AUTHENTICATION, "simple");  
     env.put(Context.SECURITY_PRINCIPAL, user);  
     env.put(Context.SECURITY_CREDENTIALS,pwd);  
     env.put(Context.PROVIDER_URL, ldapURL);  
     try {  
       ctx = new InitialLdapContext(env, null);  
       result=true;  
     } catch (Exception e) {  
       System.err.println("Invalid login for user: " + user);  
       }finally{  
       try {  
         if(ctx!=null)  
         ctx.close();  
       } catch (NamingException e) {  
         System.err.println("Invalid login for user: " + e);  
       }  
     }  
       return result;  
    }   
 //Ping the server to see if alive  
   public static String getReachableHost() {  
     String ldapURL = null;  
     try {  
       InetAddress address = InetAddress.getByName("myhost1.company.ae");  
       if (address.isReachable(3000)) {  
         ldapURL = "ldap://myhost1.company.ae:389";  
       } else {  
         address = InetAddress.getByName("myhost2.company.ae");  
         if (address.isReachable(3000)) {  
           ldapURL = "ldap://myhost2.company.ae:389";  
         } else {  
           address = InetAddress.getByName("myhost3.company.ae");  
           if (address.isReachable(3000)) {  
             ldapURL = "ldap://myhost3.company.ae:389";  
           } else {  
             address = InetAddress.getByName("myhost4.company.ae");  
             if (address.isReachable(3000)) {  
               ldapURL = "ldap://myhost4.company.ae:389";  
             }  
           }  
         }  
       }  
     } catch (UnknownHostException e) {  
       System.err.println("Unable to lookup host");  
     } catch (IOException e) {  
       System.err.println("Unable to reach host");  
     }  
     return ldapURL;  
   }  
 }  

Below are some of the common exceptions thrown by the API.

Invalid AD username or password 

[LDAP: error code 49 - 80090308: LdapErr: DSID-0C0903A9, comment: AcceptSecurityContext error, data 52e, v1db1
javax.naming.AuthenticationException: [LDAP: error code 49 - 80090308: LdapErr: DSID-0C0903A9, comment: AcceptSecurityContext error, data 52e, v1db1


SSL Port instead of HTTP


javax.naming.CommunicationException: simple bind failed: myhost1.company.ae:389 [Root exception is javax.net.ssl.SSLException: java.net.SocketException: Software caused connection abort: recv failed]

Tuesday, March 25, 2014

Weblogic decrypt password

Weblogic Server uses AES encryption to save the passwords in file.The database passwords in the jdbc files or passwords in config.xml files are encrypted using a AES cipher and the AES secret key is stored in SerializedSystemIni.dat. At times we will need to decrypt this password to get the plain password.Below are the steps to decrypt the password.

1.Copy the SerializedSystemIni.dat from $DOMAIN_HOME/security folder to the $WL_HOME/common/bin folder.

The SerializedSystemIni.dat file varies across weblogic domains.

2.Create a simple python script file for example(DecryptWLPwd.py) and copy the below contents and save the file.
from weblogic.security.internal import *
from weblogic.security.internal.encryption import *
# Remind user about how to use
raw_input("Please ensure SerializedSystemIni.dat is in the current directory now, and press ENTER to continue.")
# Get encryption service
encryptionService = SerializedSystemIni.getEncryptionService(".")  
clearOrEncryptService = ClearOrEncryptedService(encryptionService)
# Get user to enter password
pwd = raw_input("Enter encrypted password (Eg. {3DES}Y1fA34S...): ")
# Remove unnecessary escape characters
preppwd = pwd.replace("\\", "")
# Decrypt the password
print "Decrypted password is: " + clearOrEncryptService.decrypt(preppwd)


3.Start the Weblogic Scripting tool from $WL_HOME/common/bin
./wlst.sh

4.Execute the script with the below command.

wls:/offline> execfile('DecryptWLPwd.py')

The script will  prompt to confirm the SerializedSystemIni.dat file in the current directory and get the encrypted password and output the decrypted password.

Thursday, March 13, 2014

ODI 11g Additional Drivers to the Standalone Agent and ODI Studio

ODI 11g connect to Firebird SQL

ODI installation includes a set of Data Direct drivers for the following technologies: Oracle, Hypersonic SQL, SQL Server, Sybase ASE, and DB2 UDB. If additional drivers and open tools are needed, they must be added to the Standalone Agent and the ODI Studio.
Even though this post explains how we can connect to Firebird SQL but same steps can be used to any JDBC supported database.

Create a new physical architecture

Create a new Data Server.
Driver Class  : org.firebirdsql.jdbc.FBDriver
Sample JDBC URL: jdbc:firebirdsql://hostname:port/F:/RESPAKDB/respak.gdb


On Windows operating systems, go to the following directory (not created until after ODI Studio is launched for the first time)
%APPDATA%\odi\oracledi\userlib

This folder contains the additional_path.txt file that allows you to declare additional files or folders outside of the /userlib directory from which the ODI Studio acquires its libraries and drivers.
Sample
; Additional paths file; You can add here paths to additional libraries
; Examples:
; C:\ java\libs\myjar.jar
; C:\ java\libs\myzip.zip
; C:\java\libs\*.jar will add all jars contained in the C:\java\libs\ directory
; C:\java\libs\**\*.jar will add all jars contained in the C:\java\libs\ directory and subdirectories
C:\Users\xxxxxxx\AppData\Roaming\odi\oracledi\userlib\jaybird-full-2.1.6.jar


Now click on the Test Connection and you should be able to see the success message as below.

Now you can proceed to create the logical schema and use it in the models and reverse engineer and use in projects.

Thursday, February 20, 2014

java.lang.OutOfMemoryError: Java heap space when Jdeveloper integrated with SVN

When we have jdeveloper integrated with SVN, jdeveloper requires more heap space and below error might occur.

Uncaught exception
java.lang.OutOfMemoryError: Java heap space
  j.util.Arrays.copyOf(Arrays.java:2882)
  j.lang.AbstractStringBuilder.expandCapacity(AbstractStringBuilder.java:100)
  j.lang.AbstractStringBuilder.append(AbstractStringBuilder.java:390)
  j.lang.StringBuffer.append(StringBuffer.java:224)
  org.tmatesoft.svn.core.SVNErrorMessage.getFullMessage(SVNErrorMessage.java:257)
  org.tmatesoft.svn.core.internal.wc.SVNErrorManager.error(SVNErrorManager.java:58)
  org.tmatesoft.svn.core.internal.wc.admin.SVNAdminAreaFactory.open(SVNAdminAreaFactory.java:163)
  org.tmatesoft.svn.core.internal.wc.admin.SVNWCAccess.doOpen(SVNWCAccess.java:364)
  org.tmatesoft.svn.core.internal.wc.admin.SVNWCAccess.open(SVNWCAccess.java:272)
  org.tmatesoft.svn.core.internal.wc.admin.SVNWCAccess.open(SVNWCAccess.java:265)
  org.tmatesoft.svn.core.internal.wc.admin.SVNWCAccess.openAnchor(SVNWCAccess.java:145)
  org.tmatesoft.svn.core.wc.SVNStatusClient.doStatus(SVNStatusClient.java:320)
  org.tmatesoft.svn.core.javahl.SVNClientImpl.status(SVNClientImpl.java:296)
  org.tmatesoft.svn.core.javahl.SVNClientImpl.status(SVNClientImpl.java:278)
  org.tigris.subversion.svnclientadapter.javahl.AbstractJhlClientAdapter.getStatus(AbstractJhlClientAdapter.java:480)
  org.tigris.subversion.svnclientadapter.svnkit.SvnKitClientAdapter.getStatus(SvnKitClientAdapter.java:141)
  org.tigris.subversion.svnclientadapter.javahl.AbstractJhlClientAdapter.getStatus(AbstractJhlClientAdapter.java:466)
  o.ji.vcs.svn.SVNURLInfoCacheSimpleStrategy.getURLInfo(SVNURLInfoCacheSimpleStrategy.java:79)
  o.ji.vcs.svn.SVNURLInfoCache.getLastChangedRevision(SVNURLInfoCache.java:69)
  o.ji.vcs.svn.SVNOverlayProducer.createTooltip(SVNOverlayProducer.java:240)
  o.ji.vcs.svn.SVNOverlayProducer.getDecoratedOverlay(SVNOverlayProducer.java:144)
  o.ji.vcs.svn.SVNOverlayProducer.produceOverlay(SVNOverlayProducer.java:113)
  o.j.vcs.spi.VCSOverlayItemProducer.produceOverlays(VCSOverlayItemProducer.java:83)
  o.j.vcs.spi.VCSOverlayItemProducer.getOverlayItems(VCSOverlayItemProducer.java:65)
  o.j.vcs.spi.VCSNodeOverlayTracker.getOverlays(VCSNodeOverlayTracker.java:288)
  o.i.explorer.IconOverlayTracker.processPendingNodes(IconOverlayTracker.java:574)
  o.i.explorer.IconOverlayTracker.access$1400(IconOverlayTracker.java:69)
  o.i.explorer.IconOverlayTracker$7.run(IconOverlayTracker.java:487)
  j.util.TimerThread.mainLoop(Timer.java:512)
  j.util.TimerThread.run(Timer.java:462)


The heap space can be increased for JDeveloper by modifying the ide.conf and jdev.conf files of your jdeveloper installation and below is a sample value.
$installationdir\jdeveloper\ide\bin\ide.conf 

AddVMOption  -Xmx1024M
AddVMOption  -Xms128M
$installationdir\jdeveloper\jdev\bin\jdev.conf

AddVMOption  -XX:MaxPermSize=1024M

The maximum size depends on the operating system and if the errors still persist we can disable the SVN connection.

 JDeveloper > Choose Versioning>Configure  and Uncheck 'Versioning support for Subversion'


Tools like Tortoise SVN can be used to do the version control.


Friday, February 7, 2014

Java Connect to Informatica Data Service using jdbc

We had a requirement to connect to informatica and get the values from the virtual table.Using the below java code we were able to connect and fetch the records.


The Infadsjdbc.jar will need to be kept in the classpath.


 package com.sample;  
 import java.sql.Connection;  
 import java.sql.DriverManager;  
 import java.sql.ResultSet;  
 import java.sql.SQLException;  
 import java.sql.Statement;  
 import java.util.ArrayList;  
 import java.util.List;  
 /**  
 * @author venky  
 *  
 */   
     public class ConnectInfaImpl{   
     static final String DB_URL = "jdbc:informatica:sqlds//@hostname:port?dis=DIS&sqlds=N_Dummy.DS_N_Dummy";  
     static final String USER = "Administrator";  
     static final String PASS = "********";  
     public static void main(String[] args) {  
     Connection conn = null;  
     Statement stmt = null;  
     List al =null;  
     try{  
      //STEP 2: Register JDBC driver  
      Class.forName("com.informatica.ds.sql.jdbcdrv.INFADriver");  
      //STEP 3: Open a connection  
      System.out.println("Connecting to database...");  
       System.out.println("DB_URL==>"+DB_URL);  
       System.out.println("USER==>"+USER);  
       System.out.println("PASS==>"+PASS);  
       System.out.println("Connecting to database...");  
       conn = DriverManager.getConnection(DB_URL,USER,PASS);  
      //STEP 4: Execute a query  
      System.out.println("Creating statement...");  
      stmt = conn.createStatement();  
      String sql;  
      sql = "select * from my_table";  
      ResultSet rs = stmt.executeQuery(sql);  
      //STEP 5: Extract data from result set  
       al =new ArrayList();  
      while(rs.next()){  
            System.out.println("result==:"+rs.next());  
      }  
     }catch(SQLException se){  
      //Handle errors for JDBC  
      se.printStackTrace();  
     }catch(Exception e){  
      //Handle errors for Class.forName  
      e.printStackTrace();  
     }finally{  
      //finally block used to close resources  
      try{  
        if(stmt!=null)  
         stmt.close();  
      }catch(SQLException se2){  
        se2.printStackTrace();  
      }  
      try{  
        if(conn!=null)  
         conn.close();  
      }catch(SQLException se){  
        se.printStackTrace();  
      }  
     }  
     System.out.println("Goodbye!");  
   }  
   }  

Thursday, December 12, 2013

Oracle SOA Accept messages in REST format

The SOA composites can be enabled or disabled  to accept messages in Representational State Transfer (REST) format. This can be done Enabling or Disabling RESTful Web Services from Enterprise manger.


To enable or disable Web service styles:
  1. Navigate to the Web Service Endpoint page, or the Service Home page.

  2. Click the Configuration tab. For SOA composites, click the Properties tab.

  3. In the REST Enabled field, select True from the menu to enable REST, or select False to disable REST, and click Apply.


    Below is the sample SOAP request and the URL to invoke the service in restful way.

    SOAP Request


    <soap:Envelope xmlns:soap="http://schemas.xmlsoap.org/soap/envelope/">
                <soap:Body>
                            <ns1:singleString xmlns:ns1="http://xmlns.oracle.com/singleString">venky</ns1:singleString>
        </soap:Body>

    </soap:Envelope>


    REST URI


    This can be tested with any rest client.

    Please note the operation name to be used in the URI.


Thursday, November 14, 2013

Extending a SOA Domain to Oracle Service Bus on cluster

Extending a SOA Domain to Oracle Service Bus

We had our SOA environment on a two node cluster and we had to extend this for OSB.Our SOA set up is based on the enterprise deployment guide as recommended from Oracle and below are the steps we did to extend the domain.We have installed WL_HOME and MW_HOME (binaries) on a shared storage and they are available from SOAHOST1 and SOAHOST2.

Back up the installation & Enable VIP for OSB servers

To back up the existing Fusion Middleware Home and domain run the following command on SOAHOST1

tar -cvpf fmwhomeback.tar ORACLE_BASE/product/fmw
tar -cvpf domainhomeback.tar ORACLE_BASE/admin/domain_name/aserver/domain_name
Enable the Virtual IPs VIP5 & VIP6 in the SOAHOST1 and SOAHOST2.

Extend a SOA Domain to Include Oracle Service Bus

Download & Install the OSB to create a new Oracle Service Bus home.

Extend a SOA Domain to Include Oracle Service Bus

Change directory to the location of the Configuration Wizard. This is within the Oracle Service Bus directory. cd ORACLE_COMMON_HOME/common/bin ./config.sh

                          
Select Extend an existing WebLogic domain, and click Next
In the Select Extension Source screen, select Extend my domain automatically to support the following added products and select the following products (the components required by Oracle SOA and Oracle WSM Policy Manager should already be selected and grayed out):
  1. Oracle Service Bus OWSM Extension - 11.1.1.7 [osb]
  2. Oracle Service Bus - 11.1.1.0 [osb]
  3. WebLogic Advance Web Services JAX-RPC Extension
Select the select the OSB JMS reporting Provider schema.
In the Test JDBC Component Schema screen, verify that the Oracle Service Bus JMS reporting datasources are correctly verified and click Next.
In the Select Optional Configuration screen, select the following:
  • Managed Servers, Clusters, and Machines
  • JMS Distributed Destinations
  • Deployments and Services
  • JMS File Store
Click Next.
In the Select JMS Distributed Destination Type screen leave the pre-existing JMS System Resources as they are and Select UDD from the drop down list for WseeJMSMOdule and JmsResources. Click Next
In the Configure Managed Servers screen, add the required managed servers for Oracle Service Bus.
Select the automatically created server and click Rename to change the name to wls_osb1.
Click Add to add another new server and enter wls_osb2 as the server name.
Click Next.
In the Configure Clusters screen, add the Oracle Service Bus cluster
In the assign servers to clusters screen, assign servers to clusters as follows:
soa_cluster - if you are extending a soa domain.
  • wls_soa1
  • wls_soa2
wsm-pm_cluster:
  • wls_wsm1
  • wls_wsm2
osb_cluster:
  • wls_osb1
  • wls_osb2
click Next.
In the Assign Servers to Machines screen, assign servers to machines as follows:
ADMINHOST:
AdminServer
SOAHOST1
WLS_SOA1 (if extending a SOA domain)
WLS_WSM1
WLS_OSB1
SOAHOST2:
WLS_SOA2 (if extending a SOA domain)
WLS_WSM2
WLS_OSB2
Click Next.
In the Target Deployments to Clusters or Servers screen, ensure the following targets
  • Target usermessagingserver and usermessagingdriver-email only to SOA_Cluster. (The usermessaging-xmpp, usermessaging-smpp, and usermessaging-voicexml applications are optional.)
  • Target the oracle.sdp.*, and oracle.soa.* libraries only to SOA_Cluster.
  • Target the oracle.rules.* library only to AdminServer and SOA_Cluster.
  • Target the wsm-pm application only to WSM-PM_Cluster.
  • Target all Transport Provider Deployments to both the OSB_Cluster and the AdminServer. Target this library to the SOA_Cluster also only if you are planning to deploy WebLogic WebServices to it. Click Next.
In the Target Services to Clusters or Servers screen: Target mds-owsm only to WSM-PM_Cluster and AdminServer. Target mds-soa only to SOA_Cluster.
Click Next.
Enter the shared directory location specified for your JMS stores 
In the Configuration Summary screen click Extend.

Propagating the Domain Configuration to the Managed Server Directory in SOAHOST1 and to SOAHOST2

  1. Run the pack command on SOAHOST1 to create a template pack:
    cd ORACLE_COMMON_HOME/common/bin
    ./pack.sh -managed=true -domain=ORACLE_BASE/admin/
    domain_name/aserver/domain_name -template=soadomaintemplateExtOSB.jar
     -template_name=soa_domain_templateExtOSB
    
  2. Run the unpack command on SOAHOST1 to unpack the propagated template to the domain directory of the managed server:
    ./unpack.sh -domain=ORACLE_BASE/admin/domain_name/mserver/domain_name
    -overwrite_domain=true -template=soadomaintemplateExtOSB.jar 
    -app_dir=ORACLE_BASE/admin/domain_name/mserver/applications